Parts
You can use your Parts dashboard to search and select current parts, show inactive or unavailable parts, and add new parts and parts vendors.
Last updated
Was this helpful?
You can use your Parts dashboard to search and select current parts, show inactive or unavailable parts, and add new parts and parts vendors.
Last updated
Was this helpful?
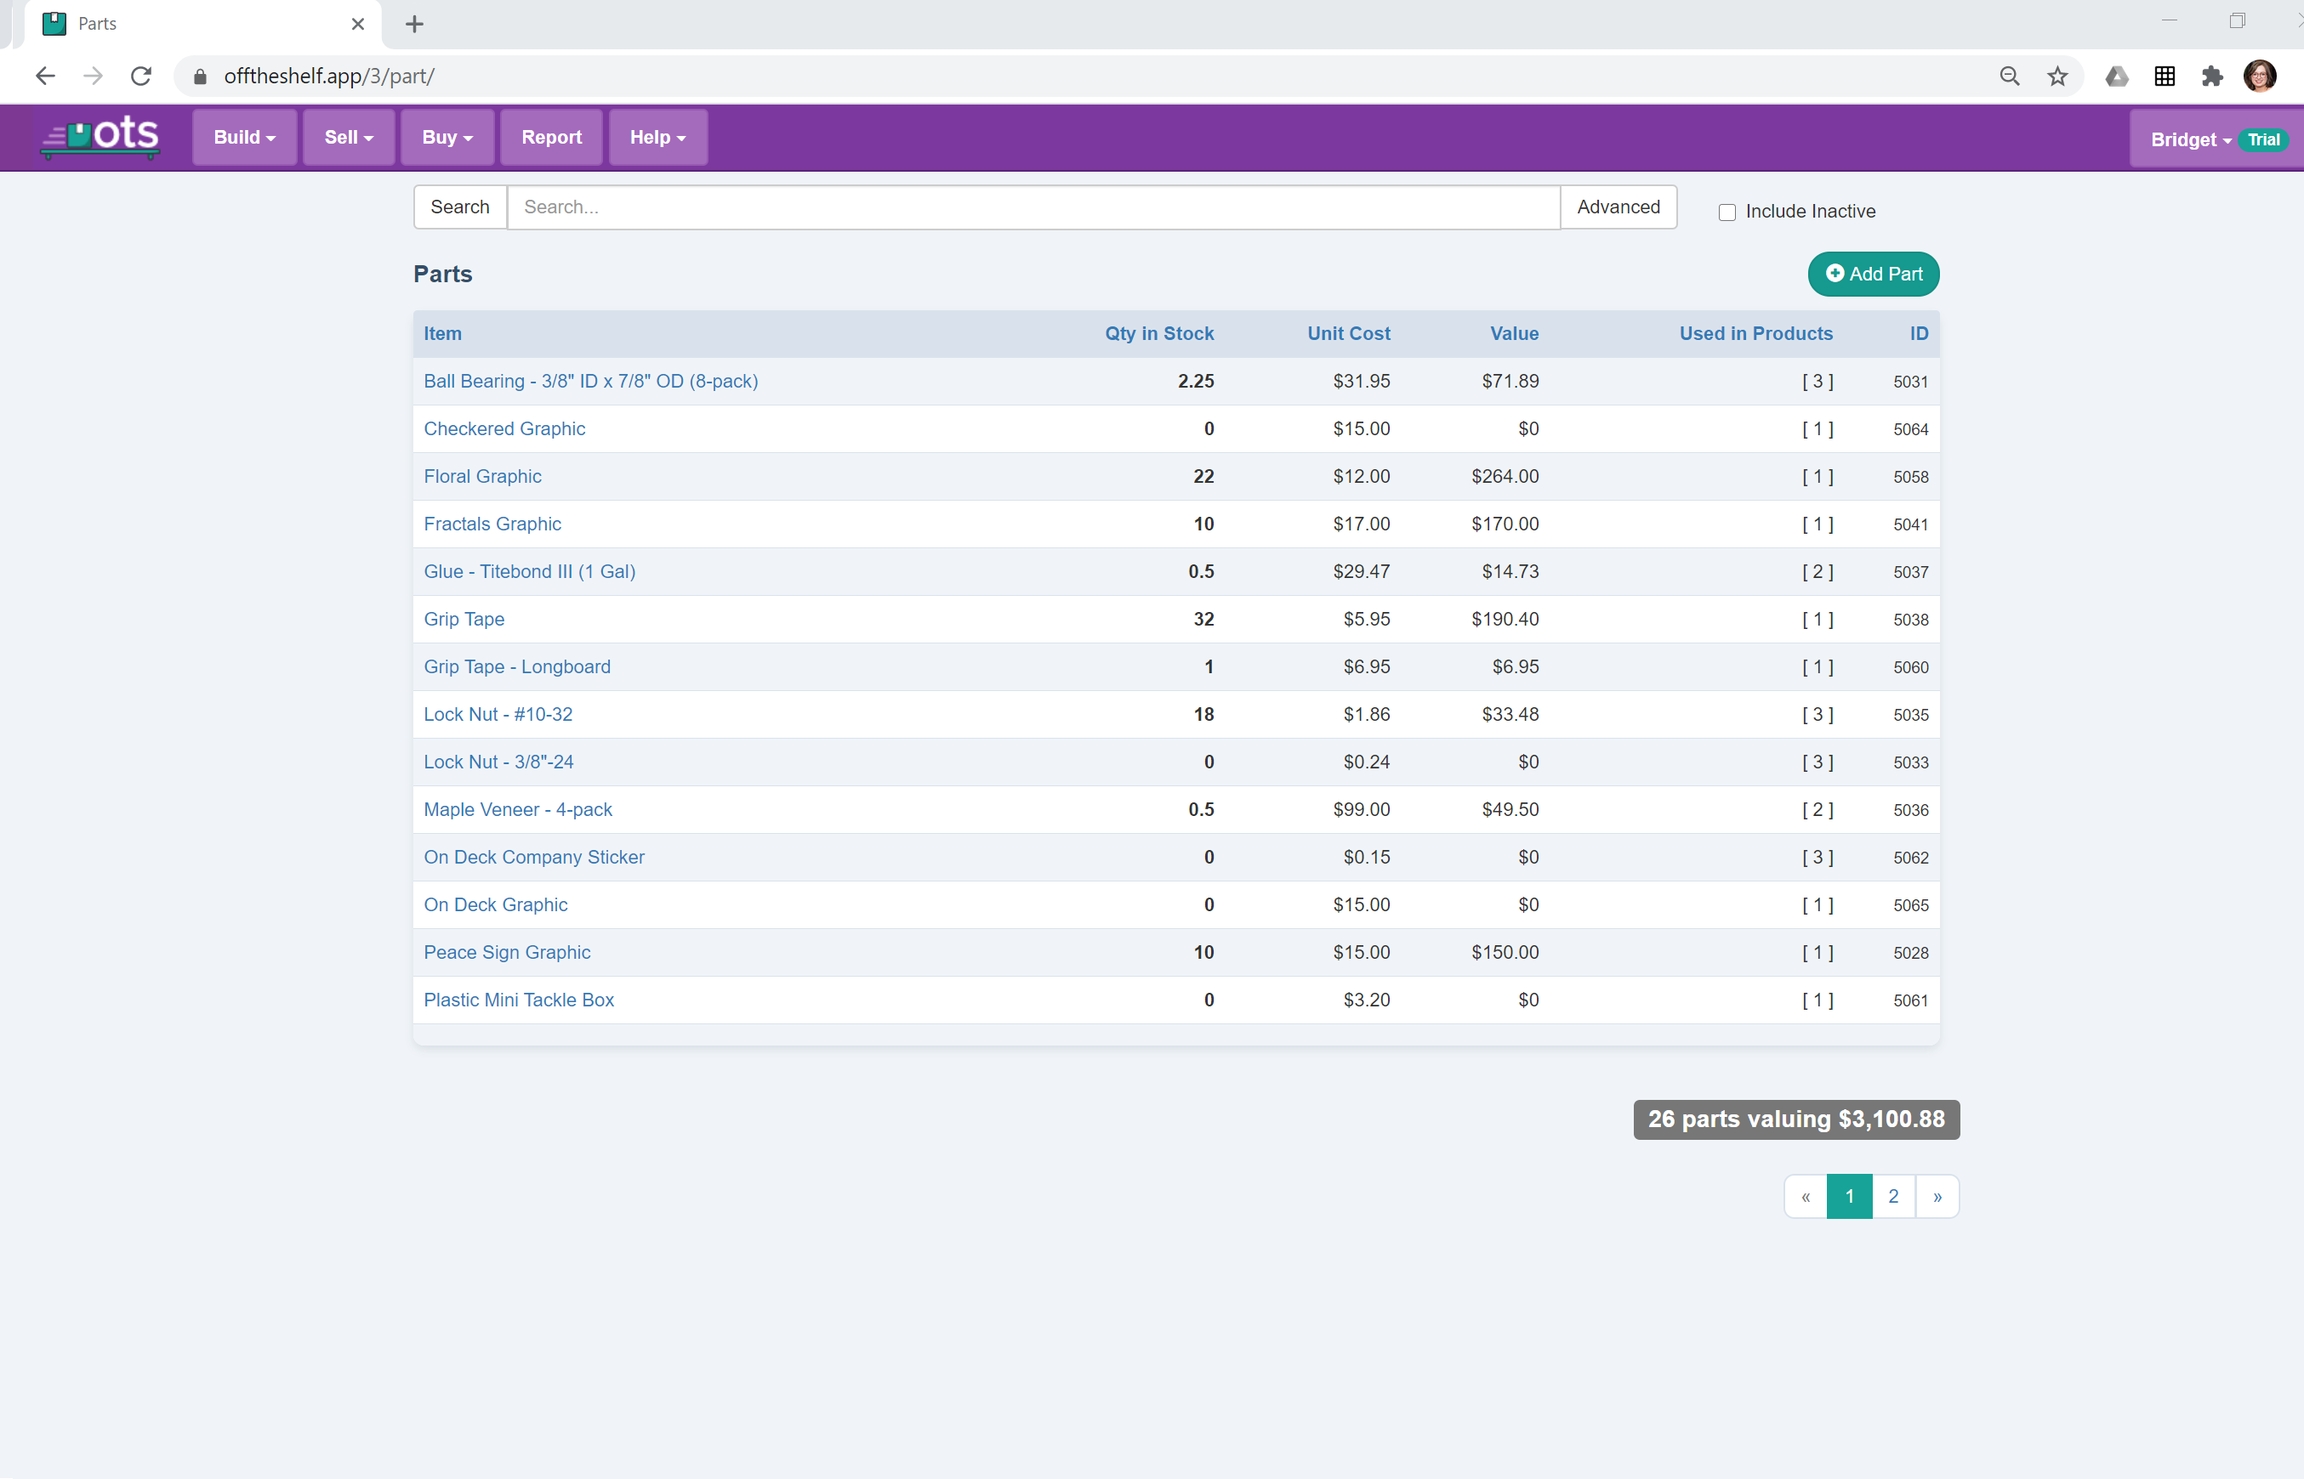
Parts are materials or components you buy from Vendors to build your Products. The Parts Overview displays a searchable list of all current Parts, their stock levels, cost, value, and ID. You can use this dashboard to search and select current Parts, show inactive Parts that may no longer be used or available, and add new Parts.
There are two ways to add a Part to Off The Shelf:
In the Parts Overview screen, select the plus button, name your part and select a Vendor. If you don’t have your favorite vendors entered yet, you can type in the company name and a Vendor will automatically be created in addition to the Part. Once the pop up has been completed, you will be navigated to the new Part’s page.
You can also add a Part from a Specific Product Overview Page. In the Bill of Materials, or “BOM”, select “Add Part”. This will navigate you to a table of existing Parts. From this display, you can select “Add a New Part”.
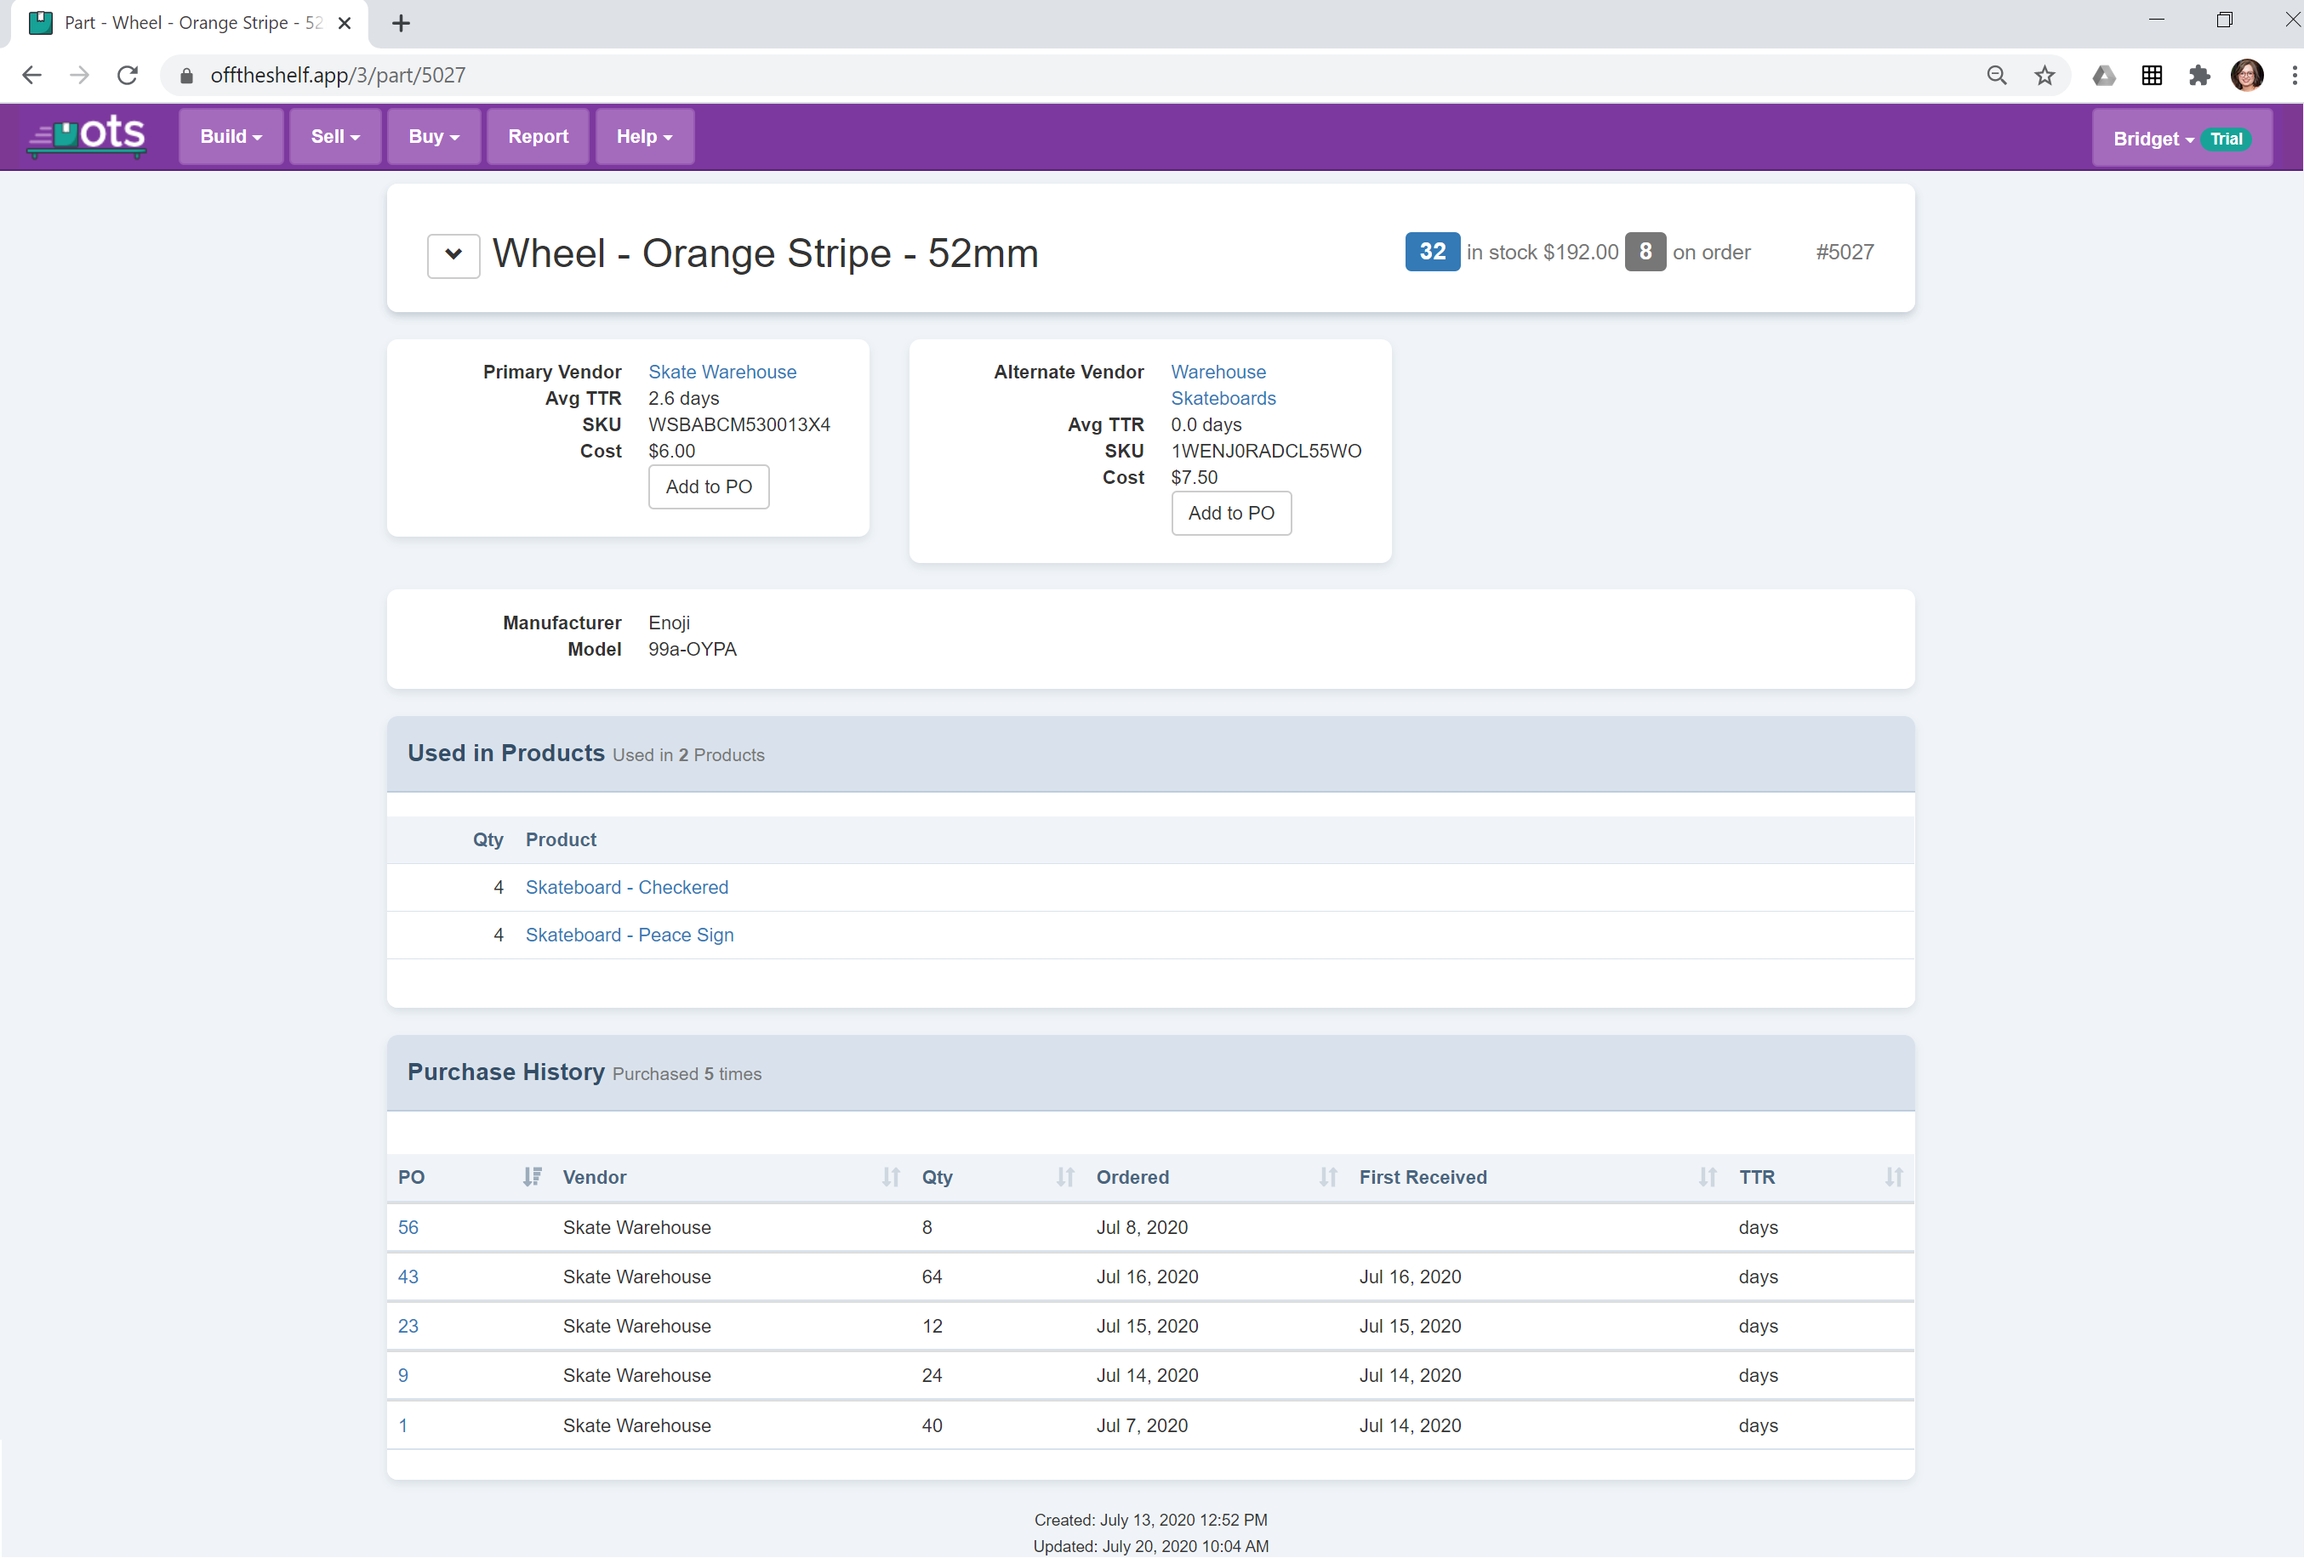
The overview page will display… an overview of the specific Part selected - nifty, right?
Blue and Grey badges to the side of the Part name display how many of this Part is in stock, the value of Parts, and how many of this Part are ordered but not yet received.
Primary Vendor, Average Time to Receive, Vendor SKU and price. In addition, you can create a new Purchase Order with this part with one click of a button.
This table will display all of your Products that this Part is used in.
This table will display all PO’s that contain this Part.
The chevron button next to the Part name offers tools and reports.
Click to add/edit details about your part. Edit the Part name, add manufacturer information, mark the part as inactive, or delete it from Off The Shelf completely. These fields are all optional to use, so choose any or all that will help you track information.
A part cannot be deleted if it is being used in a Product, or if it has been purchased on a Purchase Order.
Create a copy of the Part. Give it a new name before saving the new copy.
Return to the main Part page by selecting Part Overview.
You can print labels for your bins or shelves directly from Off the Shelf. Selecting Bin / Shelf Labels from the chevron menu navigates to a page with 5 different label options ranging from tiny to XXL. Click on the label you want, and a print dialog box will pop up.
The QR code printed on the label can be used to navigate to the part page from a smart phone making it easy for production employees to pull up details about a part from the label on the bin or shelf.
This table will display all PO’s that contain this Part.
Off the Shelf automatically adjust the stock level for Parts. When Purchase Orders are received, stock is increased. When Products are built, stock is decreased to reflect the Parts on the Bill of Materials that were consumed.
However, sometimes you need to manually adjust the stock quantity of a Part. Some common reasons to manually adjust the stock quantity are:
Damage during production
Lost Parts
Pulling Parts for an R&D project or internal use
Accurate stock levels are essential for calculating the inventory value and accurate generation of Purchase Orders. Manually changing the stock level requires an admin account.
To manually change the stock level of a Part:
Click on the blue stock badge from any Part Detail page
Fill out the Edit Stock Qty form:
Updated Stock Qty - the new, corrected stock count
Date - the date of the transaction. The default is the current date, but you can backdate a transaction when correcting historical errors.
Reason
Manual Adjustment - A generic adjustment, either increase or decrease
Used for Development - Decrease used for R&D or internal projects
Reclaimed from Development - Increase when parts are returned from R&D or internal projects
Lost or Damaged - Just what it says on the tin...
Note - A required description of the edit so you can make sense of the edit in the future.
Press Update to commit the edit, or Cancel to close the form without saving the change
You'll see the stock qty update to reflect the change.
When a Part is no longer used for production, you can make it Inactive. Inactive Parts don't show up in search lists to reduce clutter. They aren't removed from Bill of Materials automatically, but they show an obvious red badge and strikethrough wherever they are still in use. Similarly, if they are placed on a Purchase Order they display the same markings to make it clear that this Part should not be used.
To change a Part to Inactive
From the Chevron menu, select Edit
Click the Active toggle
Click Save Changes
Use this button, to the left of the Part Name, to adjust Vendor Information and more - see for details.
The to verify that parts are being put away in the correct location.
While most P-Touch labelers should work, the labels have been tested with the model.
This table reports all changes of the Part’s stock quantity, whether through a manual adjustment, receiving on a , or building a .
To include Inactive Parts in a search, check the Include Inactive option next to the search box.